Do you have a stubborn stove with a cooktop or hot surface indicator light that won’t turn off?
Even once you’ve made sure all the burners are completely off and cold, it spooks you every time you walk through the kitchen, thinking your stove was left on. If that’s the issue you’re facing, here are four common issues you could have and how to solve them!
Table Of Contents:
Light Stays On When Surface is Cold (Single Hot Surface Indicator)
If your hot surface indicator light is staying on when the cooking surface is cold, and your stove only has one indicator light, the issue could be with any of the four infinite switches.
1) Identifying the Bad Switch
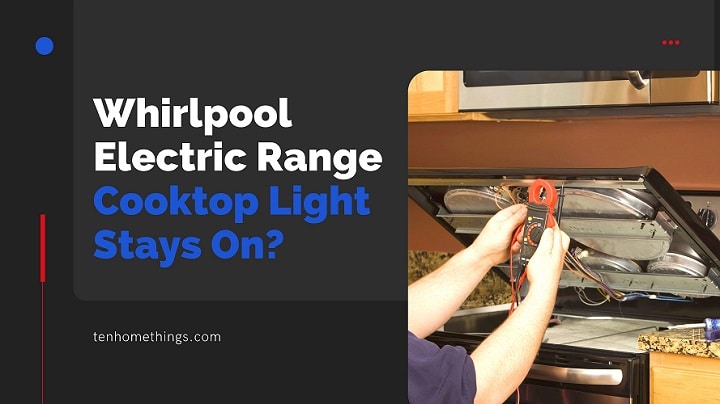
The first thing you need to do is unplug the stove and pull it out so you can access the back of it. Once you’ve got access to the back, ensure there is no power to the stove and remove the top cover.
You’ll find the switches behind your temperature knobs in the back of the stove. Locate the wires that connect to the light, and unplug one of the switches from the light. Make sure the ends of the wires are not touching anything, especially metal. You can put tape over it to make sure it’s isolated.
Plug the stove back in and examine the light. If the light went off, the switch you just unplugged is the issue. If not, unplug the stove and plug the wire back into the switch.
Repeat the process, unplugging each switch individually with the stove off until you find which one needs to be unplugged for the light to turn off. Once the light turns off, you’ve identified the bad switch, which is the one that is not plugged into the light.
2) Replacing the Bad Switch
Now take a picture of the switch to make sure you’ll be able to locate each wire’s proper location on the switch. On the switch itself, there should be a part number. That is the part you’ll need to buy to replace it. Once you’ve got the new switch, you can start the installation.
Make sure that the stove is still unplugged, and move to the front of the stove. Pull the knob off the bad switch by pulling it straight out. Then, remove the two Philips screws mounting it to the stove. Once that’s done, move to the back of the stove and unplug every wire from the bad switch. Now, if your new switch has a longer knob shaft, take a pair of pliers and knock it down to the length of the original switch.
Once it’s about the same length, you can begin to plug every wire back into the new switch the same way it was before. This is when your picture may become a handy reference. After that, mount it back on the stove with the screws and replace the knob.
Now would be a good time to plug the stove back in and ensure the indicator works as intended. Don’t forget to plug the wire from the light back into the new switch as well! If everything is working as intended, replace the top cover to the back of the stove, and you should be ready to go!
back to menu ↑
Light Stays On When Surface is Cold (Dual Hot Surface Indicators)
If the indicator light is staying on when the cooking surface is cold, but your stove has an indicator light for each side, the issue will be with one of the two infinite switches on that side of the stove. This is a more straightforward process, albeit almost the same as with a single indicator.
1) Identifying the Bad Switch
Again, the first step is to pull the stove out and unplug it. Then, remove the top cover from the back. Once inside, remove one of the two wires from the problem indicator light to one of your switches. Make sure the end of that wire is isolated, and plug the stove back into the wall. If the light goes off, the switch you unplugged is the issue. If not, it’s the other one. To be sure, unplug the stove, plug the indicator wire into the first switch, and unplug it from the other switch. Isolate it and plug the stove in. The light should now turn off.
2) Replacing the Bad Switch
The process of replacing the bad switch is the same for stoves with a single indicator light, but notably, the switches themselves will be slightly different. It’s essential to check the part number on your switch to ensure you buy the exact part you need.
back to menu ↑
The Stove Burner Stays On High
If your stove burner stays on high when turned to low or even turned off, it’s an issue worth fixing sooner rather than later. This could waste a lot of energy and make it difficult or even impossible to cook certain foods. That’s not to mention the massive fire hazard it may carry. Luckily this is also usually an issue with a bad infinite switch, so the problem is simple to solve.
1) Identifying the Bad Switch
The first thing you need to do is still to pull the stove out and unplug it. However, this time if you cannot get a burner to turn completely off, you will have to wait until it cools down after you’ve unplugged it. Also, since you know which burner is the problem, you’ll have no issue identifying the switch to change. Simply change the switch corresponding to the burner that’s not working correctly.
2) Replacing the Bad Switch
The process of replacing the bad switch is exactly the same as when your indicator light won’t turn off. It’s essential to check the part number on your switch to ensure you buy the exact part you need.
back to menu ↑
Cooktop Light Stays On (Glass Cooktop)
If you were following along before and testing your infinite switches just to find that none of them were bad, yet your indicator light still remains on, it’s probably because you have a glass cooktop stove. These stoves have another point where this issue could occur, the indicator switches attached to each burner. If you have four burners, you’ll have four of them to check, much like the single hot surface indicator scenario above.
1) Identifying the Bad Switch
Each heating element will have a pair of switches attached to them. One is the high-limit switch, which is on the same circuit as the coil. The other is the indicator switch, on a separate circuit from the coil. The indicator switch is normally open but closes at 150 degrees Fahrenheit, which is when the hot surface indicator should turn on. If your indicator is stuck on, it’s probably because one of these indicator switches is stuck in the closed position.
Since your heating elements are located under a glass cooktop, reaching them will be more complicated than the other switches.
First, pull the stove from the wall and unplug it from its power source. Then, open the oven door and remove the mounting screws holding the cooktop down in the front. Now you’ll be able to lift the cooktop and prop it up with a sturdy object. Then you can unscrew the mounting brackets your heating elements are sitting on and let them down. Now you can take the cooktop, place it out of the way, and access the elements.
In some models, the heating elements will fit snugly between the cooktop and a metal plate. In this case, you can unplug the wires and remove the whole cooktop unit to work on it. Turn it over and unscrew the mounting plate before turning it back over and removing the cooktop like before.
A continuity test with your multimeter is the easiest way to test the indicator switches. First, take a picture of the wires for reference. To perform this test, disconnect the wires to the indicator switch (labeled 1B and 2B). Set the multimeter to the resistance or ohms setting. If the limiter reads between zero and one ohm, there is continuity, and the limiter is faulty. If it doesn’t read, your switch is good.
Once you’ve identified the faulty limiter, it’s time to replace it. Unfortunately, you’ll have to replace the entire heating element with the faulty switch for these stoves.
2) Replacing the Bad Heating Element
Remove the heating element with the bad switch and note the numbers in the spring clips on the bottom. You can use these numbers to find a replacement part. Now remove those clips and place them on the new heating element, ensuring they are in the same locations. Reconnect the wires according to the reference photos from before.
Now it’s time to reattach the mounting bracket or plate. Replace the cooktop, ensuring it’s connected to the mounting bracket or plate, and replace the mounting screws at the front of the stove. Plug the stove back in and ensure it’s working as intended.
back to menu ↑
How do I reset my Whirlpool electric range?
In the case of a PF or power failure indication, you may be able to reset it by just turning the breaker off and back on. If that doesn’t work, your keypad or other electrical components might be bad, and it might be time to replace them.
back to menu ↑
How to use a Whirlpool electric cooktop properly?
An electric cooktop works just like any other cooktop. You put your skillets and pots on it and let them heat up. However, it’s a good idea to avoid moving anything across the surface as it could scratch the glass.
Make sure to wipe it clean regularly to avoid food burning onto the glass and becoming difficult to scrape off later. If you’ve got an induction cooktop, you may have been told only to use induction cookware. However, did you know you can use non-induction cookware on an induction cooktop?
back to menu ↑
How do you clean a Whirlpool electric cooktop?
If you’ve already gotten food burnt onto the glass, dish soap and vinegar are great for loosening it up. Put the dish soap on with a sponge, covering all the gunk. Then, pour some vinegar over the top and let it soak for about 30 minutes.
Afterward, take a razor blade and scrape the top layer of gunk off. Once you’ve got that top layer of gunk off, wipe off the solution and all the gunk you got loose. There’s still a lot of gunk beneath, which you can remove by using the corner of a razor blade edge.
Put it at about a 15 to 25-degree angle to the glass with the edge flat against the glass. Be careful not to put the corner directly against the glass, as this may scratch it. A fantastic tutorial, How to Clean Burnt Stove Top, shows this technique shows a massive amount of gunk removed from a glass cooktop with ease.
References:
1) Stove Burner Light Won’t Turn Off Whirlpool
2) How to repair a Whirlpool flat-top stove burner
Shanny
Shanny not only has an exceptional understanding of the foodie mindset and how nutrition works, she has also achieved her Master’s Degree in Education. Outside of her academic achievements, she loves writing food blogs. It's so much more than a list of meals though! Shanny creates helpful cookware guides and delicious recipes that are easy to follow. She does all of this as a food blog writer because she loves it. That's why she spends lots of time testing out different recipes in her own home. She truly is a one-of-a-kind foodie, from her home to yours - with a story to tell, new recipes to indulge in and new tips to tantalize those tastebuds.


